HEADER LAYOUT BY ALMOST READY BLOGS ELEMENTS BY APRILISA DESIGNS
Showing posts with label Stash. Show all posts

Tuesday, April 20, 2010

Earring Holder


I saw this cute earring holder on A Girl and a Glue Gun and loved it. My daughter is starting to care about wearing jewelery and has gotten a bunch of earrings for her birthday this week. So I dug through my stash, found a frame, some leftover paint, plastic mesh (free from a friend), some ribbon, and as A Girl and a Glue Gun would do plugged in my own glue gun and went to town.

This holder matches her room and she is gonna SQUEAL!


Thanks so much for the fab idea!

Friday, April 9, 2010

Let Sleeping Babies LYE!


Seems like these days my crafts have been more functional than fun, but I do have a fun time making them so I guess they are FUNctional...I know corny. Anyhoo, at my house it's inevitable that when the baby is sleeping someone rings the door bell. It's almost always the same culprit too...the neighbor kids. So I made a cute sign to hang on my door and we'll see if they actually read it.


Found a 6x8 canvas at a garage sale this morning, and painted it brown, then added orange accents to match my paper. Modpodged paper and letters on... it wasn't rocket science.

Total cost for this project 30 cents! I got the canvas that I used at a garage sale today for 30 cents and the rest of the stuff was from my stash!

Friday, February 5, 2010

Feel the LoVe


I love Valentine's day. Sadly enough my hubby thinks it some made up holiday that is pretty much pointless. (and really if you think about it, it is) Thankfully he's sweet to me all year long so I don't miss Valentine's Day too much. I do however take the opportunity to do some things for the kids. They usually get some candy or a little trinket of my love. This year I came up with this really cute idea for book marks. I made some for Christmas and they were a hit, so I hearted them up and they are ready for Valentine's Day.


I am trying soooooooo hard to get better at photographing my things, this is better don't ya think? (lie to me if you have to!) Anyhoo, I used really stiff fusible interfacing. It is fusible on both sides so you can sandwich it in between two pieces of fabric. I tried to get a pic that showed how stiff it is:

Basically I just fused two pieces of fabric to the interfacing. I used Wonder Under to fuse the middle section to the book mark, and then just zig zag stitched around it all. Be sure to put your ribbon in while you are fusing the first pieces. I'm going to be making more of these for my sewing students so I'll post pictures when I do.

I had the interfacing and ribbon here already in my stash, and the fabric was leftover from my barter with Heather. She was kind enough to let me keep the excess! So all of that equals FA-REE! My girls are gonna squeal when they see these.

Saturday, January 30, 2010

I heart BABIES!!

My all time favorite things to make are anything baby! There are so many cute things out there right now for baby, things I wish I had when I had my first. Where were nursing covers when I was sitting in the foyer at church on a couch in the middle of all the people trying to keep a blanket on my shoulder while nursing, then skipping it all together because my baby was freaking out because it was too hot? Where were cute chic diaper bags when I was carrying Winnie the Pooh on my arm? Where were cart covers when I was wiping down the whole cart with a baby wipe hoping we wouldn't get pink eye AGAIN?

Well, I had a baby shower to attend this weekend, it was my friend's 3rd boy so I'm sure she was set for lots of things. So I whipped up a few bibs for her because those are something that get nasty fast.


They are made of denim, and flannel. I clipped the edges so when they get washed they will fray a little and look like fringe. I had all my supplies here at home in sta-ash so they were fa-ree!

Friday, January 15, 2010

My attempt at being a little more organized

I don't claim to be an organized person. I'm sure my husband is sitting here snickering right now. To tell you the truth he is WAY more organized and tidy than I am. One room that gives me fits when it comes to tidiness is our master bathroom. I feel like it is a catch all for every one. My girls are always digging through my drawers for hair bows, my oldest always wants the styling products, they are constantly stealing our toothpaste, or leaving theirs in here, and don't get me started about the laundry. Why can't the clothes make it into the basket? It's all a bit overwhelming so I decided to start small.

Just to keep things real here is a picture of my "hair" drawer:

Yeah, it's bad.

So here was my solution:

SOOO much better! I whipped theses cord keepers up in a jiffy from supplies I already had here in... you guessed it... my stash!

They were so easy and here's how I did it:

First cut a piece of fabric 5"x7" (you can make it bigger if you have a bigger cord. Oh, and yeah that's my funky retro 70's orange towel that I use for an ironing board in the background. Don't you lurve it?)

Second: Fold it in half lengthwise, right sides together and sew up 2 sides.

Here's my cute machine sewing up both sides.


Clip your corners so it will lay correctly.


Flip it right side out. I top stitched mine because I'm a topstitchin' fool. Just make sure you close up the end that is open.


Cut your Velcro the size of half of your keeper. Sew one side of Velcro on one half of one side. Flip it over and sew the other side of the Velcro on the opposite side of the keeper.

Here's your finished product.


OK, I went a little crazy with these. I have them all over the house now making all my cords tidy! They are so cute and soooo easy!

I linked up over at Thrifty Decor Chick! Check her out she totally ROCKS!!

copyright 2009 HomeSpun-Threads

for Thrifty Decor Chick

Tuesday, December 15, 2009

"Tis the season for gift exchanges!


The closer we get to Christmas it seems the more parties and gift exchanges we are involved in. Sure mostly they have a $5 limit on them, that's not so bad, right? Well times that by 4-5 gift exchanges and it can really add up. So last night my daughter and I rummaged through my craft room for a project for her gift exchange at church. She was actually really excited to make a gift and she thinks she may try and get this one back for herself tonight. Here is what she came up with:

Yes, another project from a block of wood, but they sure are cute.

Tuesday, December 1, 2009

Do you have a gift closet?

Well Ok maybe mine is not a whole closet but it's slowly starting to take over my clothes closet. I am getting into the habit of picking things up on clearance and storing them away for the future. It really comes in handy when you have a baby shower to attend, or a birthday party, just head to your gift stash and find something great.

I find things all over. I'm not a huge fan of Wally World (you know the store I mean) but you can find really great deals on things there. Sometimes they even mark their clothes down to $1, and you cannot make it for that price. I also like to shop the craft stores for their clearance items and have a few things that I can throw together in a jiffy.

Today I was a WW and found backpacks for $1, they are cute and girly and I don't know who they will go to yet but they are headed for the closet as I type. The other day I found cute beaded butterfly trim at the fabric store on clearance for $.25 a yard, YES 25 CENTS! I bought it all.

It is very important to go through your gift stash occasionally it can get quite messy!

Wednesday, November 18, 2009

No Sew Cute

I found this great idea for a no-sew craft here I loved it so much I had to make one of my own. As usual it was done with things I already had around the house so it was FA-REE!!

Before:
And AFTER:


An up-close so you can see the detail. I used only 3 different fabrics, not including the green and red at the bottom for accent. I also embellished with a little pearl trim (.25 cents on clearance at Joann's years ago!)

Tuesday, November 10, 2009

Cookin' with Fire... Cute Fire!

I am one of those strange women that actually likes getting kitchen "things" for gifts. Christmas, birthday, anniversary, even Mother's Day, I love kitchen stuff. I love it even more if the stuff is cute. Nothin' better than serving your treat at a church potluck with those cute spoons your hubby got you for your birthday or going to the Mother's Day Tea with your beautiful serving dish your Mother-in-Law brought you from "Out West"!

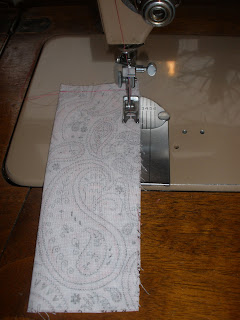
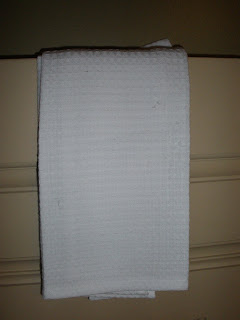
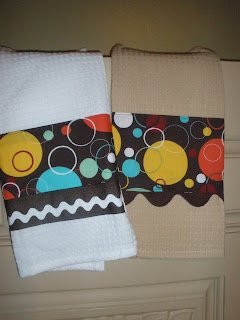
Along with all those kitchen things comes cute accessories. I have several adorable aprons that unfortunately get a lot of use, I also have great kitchen towels. These are some hotties I whipped up from the things I had in my stash. Towels are from the Dollar Store bought years ago, fabric was free from a friend, and trim was some I had in a drawer probably bought years ago also.


Here's what they were before:

And after:

Don't know who is getting these treats, maybe they will stay at my house. Who know's!!

Friday, October 2, 2009

Using Your Stash

The key to free gifting is simple, use what you have. I know this is a foreign concept for a lot of people. There are so many cute things in the stores nowadays, new fabric designs, cute crafting papers, adorable embellishments, and don't get me started on the gadgets. There's a gadget for just about anything that would make your life so much better. DON'T FALL INTO THE TRAP! You have cute stuff at home, you can often do without the gadget, and seriously you'll respect yourself more in the morning if your project was free (or really cheap) rather than spending money unnecessarily.

I know you all have a "stash", you know what I mean even if you don't want to admit it. Any self respecting crafter has a stash of some kind, fabric, paper, stamps, ribbon, the list could go on and on. Heaven forbid you have several hobbies then the stash can be pretty extensive. Mine consists of LOTS and LOTS of fabric, some paper, stamps, embellishments, gadgets, paints etc. I try and use what I have before I hit the craft store. Usually I can find enough fabric for any crafting project, and enough paper for most paper projects in my craft room.

Well I did some "Stash Crafting" today and this is what I came up with:

You have to remember that my crafting skills far outweigh my photography skills! These are tiny little composition books that I found on clearance months ago for about 60 cents each. They are about 4" x 2 1/2" and are stinkin' adorable all on their own. Here's how I did it:


First cut a piece of cute paper just bigger than the outside cover of the book. I wanted the black spine to show so it worked best to use the already straight edge of the paper so it will look neat and tidy.

Apply glue (I used a glue stick) to both the paper and the book. Press the paper into place. Use scissors to cut the paper to the size of the book, after you glue the paper on. Add embellishments to your hearts desire! You have a great gift. I think all in all I only spent about 75 cents and that wasn't today, remember I used my stash.

So use your stash and your imagination and see where they take you.